

")
This top to bottom guide will make you each stride of the route through introducing Ubuntu Linux on your Mac, by a method of VirtualBox – a free and exceptional program. Utilizing this technique you’ll have the capacity to run Ubuntu and OS X in the meantime!
Install Ubuntu on your mac
Before you start here are the things you should know!
- Depending on the speed of your Internet connection, it might take a while to download Ubuntu.
- The installation time is about 20 minutes, depending on the speed of your Mac
- Running both Ubuntu and OS X at the same time will “slow down” your Mac.
Let’s get started!
- First, go Ubuntu download page and download the 64-bit version of Ubuntu.
- Now download and install VirtualBox. Visit their download page and click the link titled “x86/amd64”
- When VirtualBox opens, click the New button.

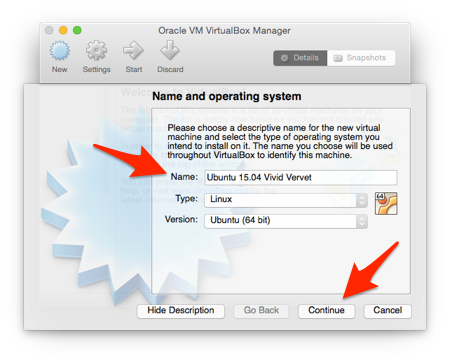
- Give your “virtual machine” a name (Make sure the Type: is set to Linux and the Version: is Ubuntu (64 bit))
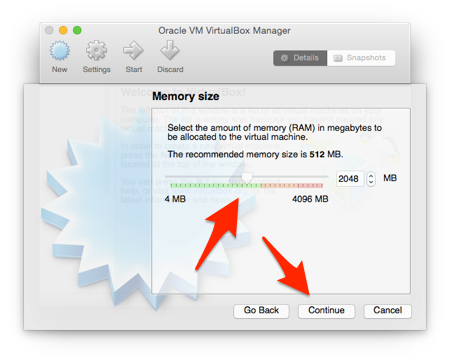
- Now Select how much memory (RAM) you want allocate to Ubuntu when it’s running.
- On the Hard drive screen, select Create a virtual hard drive now
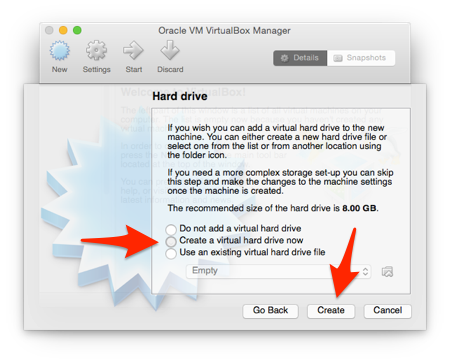
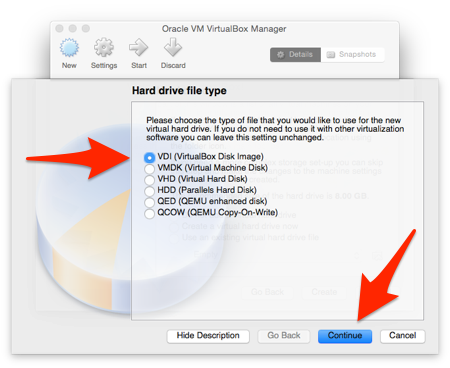
- Now select VDI (VirtualBox Disk Image) and click Continue
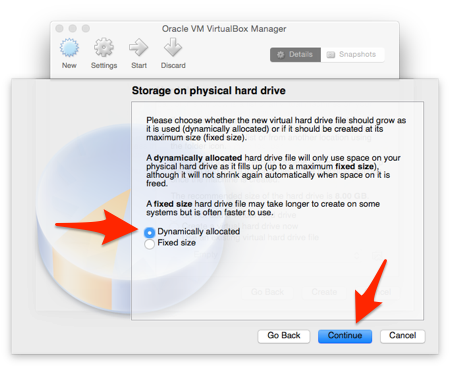
- Select Dynamically allocated and click Continue
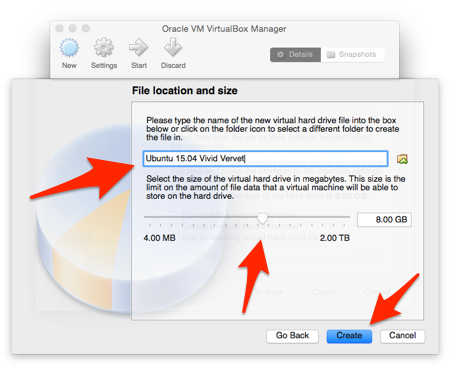
- Give the “VirtualBox Disk Image” a name, Use the “slider” to determine the size you want to make the “hard drive” for Ubuntu.
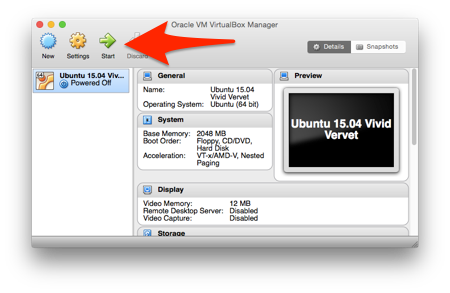
- Almost Done! Click the Start button.
- Right away you’ll be prompted to locate a file. Click the “folder” icon next to menu that says Empty (see screenshot below).
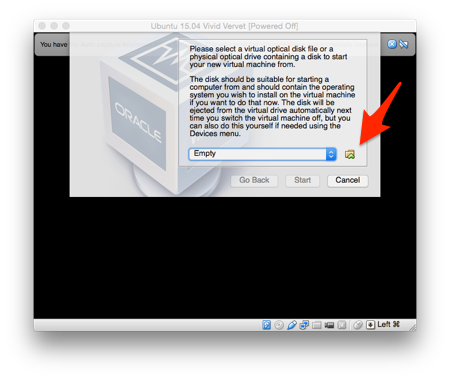
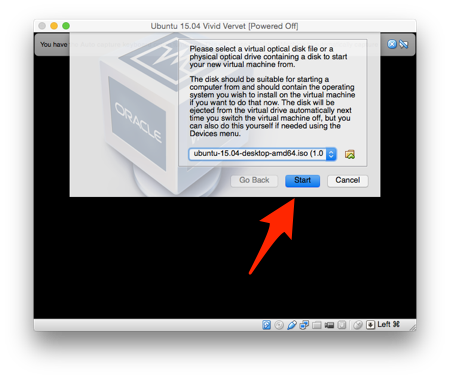
- Navigate to the Ubuntu .iso file that you downloaded. Select it, and click Open

- Now click Start
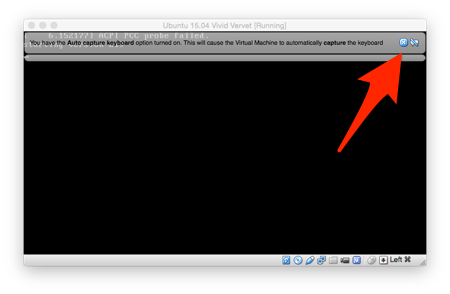
- As Ubuntu boots for the very first time, So VirtualBox will pop little messages stating how the keyboard and mouse will work with your new ‘virtual machine’. Read them, then click the little X to close them.
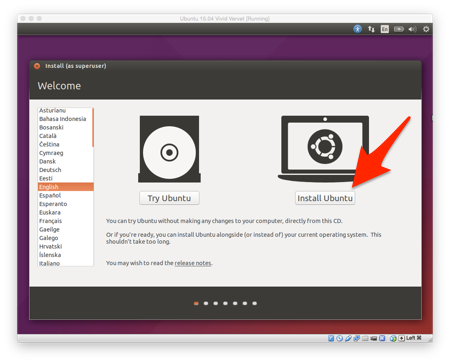
- Finally! Click Install Ubuntu
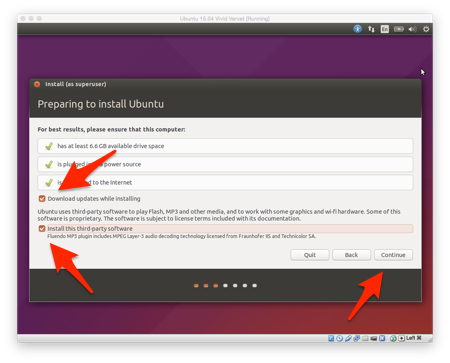
- Ubuntu will run a quick test to ensure your computer is capable of running on it. Do check all the boxes and hit continue.
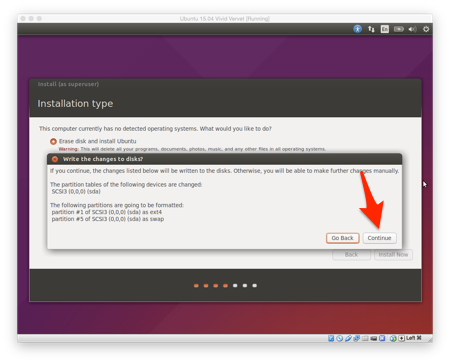
- Select Erase disk and install Ubuntu.
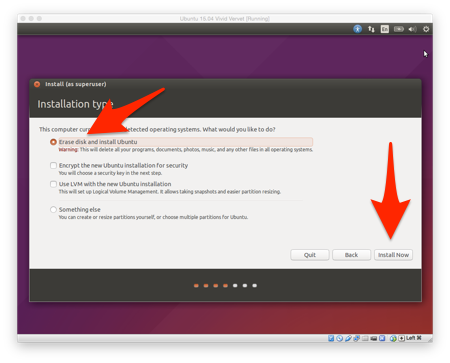
- Click Continue
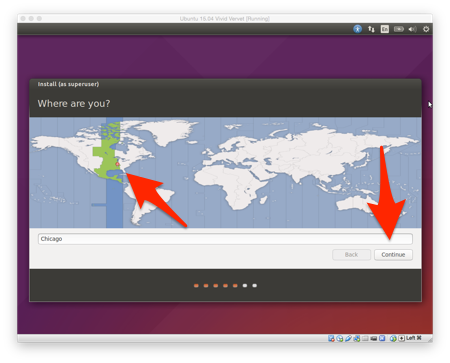
- When prompted, select your Time Zone and then click Continue
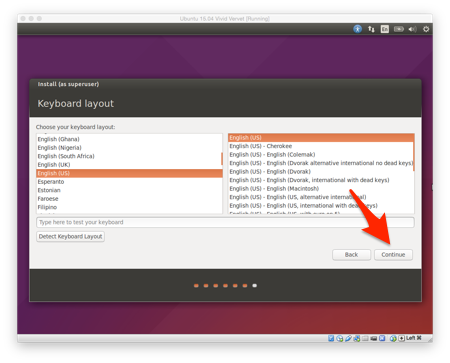
- Fill in each field with the required information. and hit continue.
- This may take a bit.
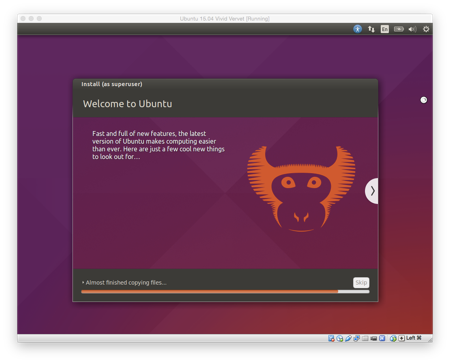
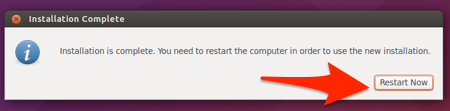
- Yay! It’s done! Click Restart Now
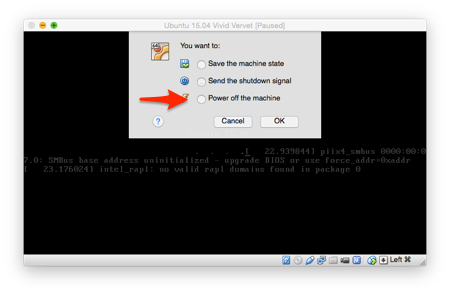
- If Ubuntu doesn’t start loading, and you’re left at a screen. Click the OS X “Close” button (the red one in the upper left corner).

- Select Power off the machine and click OK
- And you’ll boot into Ubuntu! Enter your password when asked.
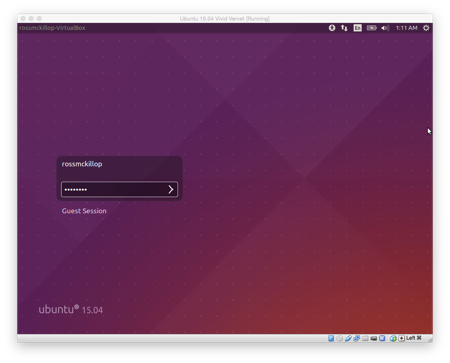
- Welcome to the Ubuntu Desktop!

Worried about clicking erase I don’t want to loose what I have on my computer
You won’t, this does not have any effect on your computer 🙂 Just did it myself, everything’s fine